juin 2017

logo
logo rescatux


Description


Rescatux is a GNU/Linux repair cd (and eventually also Windows) but it is not like other rescue disks. Rescatux comes with Rescapp. Rescapp is a nice wizard that will guide you through your rescue and repair tasks.

When the wizard is not able to solve your problem you can also enjoy of Rescatux unique support features:

* Chat: Open the chat for asking help directly in Rescatux channel.
* Share log: After running an option you can share its log (the action registry that it has done) so that in the chat they can help you better. O better, even, you can help debug and fix Rescatux bugs on the fly.
* Share log on forum: Prepares a forum post alike text so that you can just copy and paste it in your favourite forum. Logs are nicely inserted into it with [CODE] symbols.
* Boot Info Script: Run Boot Info Script option to share your computer configuration (specially boot one).

Boot options:
  • (>=0.41 beta 1) Update UEFI order
  • (>=0.41 beta 1) Create a new UEFI Boot entry
  • (>=0.41 beta 1) UEFI Partition Status
  • (>=0.41 beta 1) Fake Microsoft Windows UEFI
  • (>=0.41 beta 1) Hide Microsoft Windows UEFI
  • (>=0.41 beta 1) Reinstall Microsoft Windows EFI
  • (>=0.41 beta 1) Check UEFI Boot
GRUB options:
  • (>=0.40 beta 11) Easy GNU/Linux Boot Fix
  • Restore GRUB and GRUB2
  • (>=0.31 beta 4) Update any GRUB2 menues
  • Update Debian/Ubuntu grub menues
Windows options:                                                                       

  • Restore Windows MBR (BETA)
  • Clear Windows passwords
  • (>=0.31 beta 4) Promote a Windows user to Administrator role
  • (>=0.41 beta 1) Reinstall Microsoft Windows EFI
  • (>=0.31 beta 4) Unlock Windows user
Password options:
  • Change Gnu/Linux Password
  • Regenerate sudoers file
  • Clear Windows passwords

Downloadrescatux-0.41b1.iso


Tutoriel : 


The WinUSB fork we covered a while back was renamed to WoeUSB recently, while also seeing quite a few releases for the past few days.

WoeUSB

WoeUSB / WinUSB is a tool that can be used to create a bootable Windows installer USB stick from an ISO or DVD. The application supports Windows Vista, Windows 7, Windows 8, as well Windows 10, and can be used either with a GUI or from the command line.

As for supported bootmodes, WoeUSB / WinUSB can create a bootable Windows USB installation stick using the following:
  • Legacy / MBR-style / IBM PC compatible bootmode;
  • Native UEFI booting is supported for Windows 7 and later images (with a limitation: only FAT filesystem can be used as the target filesystem).

Since it was forked from Colin Gille's WinUSB, the application has seen a major code refactoring, bug fixes as well as some minor new features. The changes include:
  • support for both wxWidgets 2 and 3;
  • use pkexec instead of gksudo for privilege escalation;
  • UEFI boot support;
  • numerous bug fixes.

Some newer WoeUSB changes include:
  • support customizing the --label of the newly created filesystem in --format mode;
  • implement checking on target filesystem in --install mode;
  • command line: check if target media is busy before continuing and bail out when the target partition is mounted;
  • support Linux distributions that uses "grub2" as prefix name, such as Fedora;
  • --install and --format installation options are deprecated in favor of --partition and --device, to be more clear what both options will do. The old options will still be available until WoeUSB v3.0;
  • from now on, GRUB will pause when the ENTER key is used before starting to load Windows. This is useful if you want to see if there are errors in the GRUB loading stage.

Also, since the application name has changed, the executables have changed as well: "woeusbgui" for the GUI and "woeusb" for the command line tool.

You can see what's new in each new WoeUSB release (there were 13 new releases for the past 2 days) on GitHub.

Despite the major code refactoring and numerous bug fixes, I still encountered an error using the WoeUSB GUI, which I also found in the original WinUSB. When the Windows USB stick is completed, WoeUSB displayed the following message: "Installation failed ! Exit code: 256". This bug was closed on GitHub and it looks like it doesn't affect the actual Windows USB stick in any way. 

In my test, I was able to install Windows 10 64bit in VirtualBox (on an Ubuntu 17.04 host) despite this error.


Install WoeUSB in Ubuntu or Linux Mint via PPA


WoeUSB is available in the main WebUpd8 PPA, for Ubuntu 17.04, 16.10, 16.04 or 14.04 / Linux Mint 18.x or 17.x. To add the PPA and install WoeUSB, use the following commands:
sudo add-apt-repository ppa:nilarimogard/webupd8
sudo apt update
sudo apt install woeusb


[Quick update] Terminix, a GTK3 tiling terminal emulator, has been renamed to Tilix due to some trademark issues.


Besides the new name, there's also a new version, 1.5.4, which includes a few bug fixes:
  • detaching terminal in Wayland by dropping it on desktop now works identically to X11;
  • fixed issue with outdated LDC libraries on Fedora, this should allow COPR to work again;
  • fixed issue with close dialog and long process names resulting in excessively wide dialog box;
  • removed animation hint feature from quake mode as it was causing focus issues;
  • fixed crash when loading multiple sessions from file.

Note that in my test, the Terminix settings weren't migrated to Tilix, so if you changed some of its settings, you'll need to do it again for Tilix. Update: to migrate your Terminix settings to Tilix, see the Migrating from Terminix section on the Tilix GitHub page.

Also, if you use Tilix as a drop-down terminal, remember to change the command from "terminix --quake" to "tilix --quake".


Install Tilix (previously Terminix) in Ubuntu or Linux Mint via PPA


I updated the package in the WebUpd8 Terminix PPA to use the new Tilix name. To make sure those who have previously installed Terminix will receive an update with the new package, I added a transitional package, so updating using Update Manager, Synaptic, apt, and so on, should upgrade to Tilix 1.5.4.

I will continue to use the ppa:webupd8team/terminix PPA for Tilix, because PPAs can't be renamed (besides the PPA title).

I should also note that the PPA now provides Tilix packages for Ubuntu 17.04 (which has Terminix an old 1.4.2 version available in the official repositories).

To add the WebUpd8 Tilix PPA and install the latest Tilix in Ubuntu 17.04 Zesty Zapus, 16.10 or 16.04 / Linux Mint 18.x, use the following commands:
sudo add-apt-repository ppa:webupd8team/terminix
sudo apt update
sudo apt install tilix

Features


Getting Tilix

The best way to get Tilix is from packages maintained for your specific Linux distribution. The following distributions have packages available.


INSTALL VMWARE PLAYER 12 ON UBUNTU 16.04 or ALL Version 

In this discussion we are going to learn how to install vmware player 12 on ubuntu 16.04. Vmware Player 12 also referred as Vmware Workstation Player is a Virtualization software launched by vmware on year 1998 used for cloud computing, There are so many types of applications are launched by vmware for different needs i.e.Vmware Workstation, Vmware Player, Vmware Server, Vmware GSX Server, Vmware ESX Server and so on. and It’s available for Microsoft Windows, Linux and Mac OS X. The First launch of Vmware is Vmware Workstation and Vmware Player is a Freeware.
The main advantages of Vmware is we can install multiple Operating Systems on a single server, and we can install maximum 16 Virtual Hosts in one server. And Other features are like we can Customize RAM, can add as many Harddisks, Video Capturing, Can take Snapshots, Suspend the Virtual Host and so on, In Today’s Business world vmware plays a very important role and due to this we can save so many cost.

Vmware Player 12 Installation Steps :

Step:1 Prepare for Installation

Before Install Vmware Player 12 package Let’s install/update newer version of packages and their dependencies by using below command.
   
   elinuxbook@ubuntu:~$ sudo apt-get update   # Update the Packages and Dependencies
   [sudo] password for elinuxbook: 
   Get:1 http://security.ubuntu.com/ubuntu xenial-security InRelease [102 kB]  
   Hit:2 http://us.archive.ubuntu.com/ubuntu xenial InRelease                  
   Get:3 http://us.archive.ubuntu.com/ubuntu xenial-updates InRelease [102 kB]    
   Get:4 http://us.archive.ubuntu.com/ubuntu xenial-backports InRelease [102 kB]
   Fetched 306 kB in 3s (80.4 kB/s)   
   Reading package lists... Done                                      

Now we need to Install some dependencies which is required for Vmware Player 12 Installation, So follow the below steps :
First Install build-essential and gcc as shown below.
   
   elinuxbook@ubuntu:~$ sudo apt install build-essential gcc
   Reading package lists... Done
   Building dependency tree       
   Reading state information... Done
   build-essential is already the newest version (12.1ubuntu2).
   build-essential set to manually installed.
   gcc is already the newest version (4:5.3.1-1ubuntu1).
   gcc set to manually installed.
   0 upgraded, 0 newly installed, 0 to remove and 286 not upgraded.                                  

Then install libcanberra-gtk-module as shown below.
   
   elinuxbook@ubuntu:~$ sudo apt install libcanberra-gtk-module
   [sudo] password for elinuxbook: 
   Reading package lists... Done
   Building dependency tree       
   Reading state information... Done
   libcanberra-gtk-module is already the newest version (0.30-2.1ubuntu1).
   libcanberra-gtk-module set to manually installed.
   0 upgraded, 0 newly installed, 0 to remove and 286 not upgraded.                                  


As shown above all required dependencies are already installed with OS, So let’s proceed for Vmware Player Installation.

Note: By Default above Packages and Dependencies are already installed in Ubuntu 16.04, If not then you can install it by following above steps.

Step: 2 Download Vmware Player 12 Package

Click on the below link to Download the Vmware Player 12 Package from Official Vmware Website.
Download Vmware Player Package
As shown below I have Downloaded the Vmware Player 12 Bundle Package, Which is currently don’t have Executive Permission and without that we can’t install the Package, So change the permission by chmod command.
   
   elinuxbook@ubuntu:~$ cd Downloads/
   elinuxbook@ubuntu:~/Downloads$ ls -l
   total 134308
   -rw-rw-r-- 1 elinuxbook elinuxbook 137530948 Dec 16 20:33 VMware-Player-12.5.2-4638234.x86_64.bundle                                

Use the below command to give Execution Permission to Vmware Player Bundle Package.
   
   elinuxbook@ubuntu:~/Downloads$ sudo chmod +x VMware-Player-12.5.2-4638234.x86_64.bundle 
   elinuxbook@ubuntu:~/Downloads$ ls -l
   total 134308
   -rwxrwxr-x 1 elinuxbook elinuxbook 137530948 Dec 16 20:33 VMware-Player-12.5.2-4638234.x86_64.bundle                                

Step : 3 Install Vmware Player 12

As we can see above Now Vmware Player package has Execution Permission, So follow the below step to Start the Installation of Vmware Player.
   
   elinuxbook@ubuntu:~/Downloads$ sudo ./VMware-Player-12.5.2-4638234.x86_64.bundle 
   [sudo] password for elinuxbook:

As we can see on the snapshot below The Vmware Player Installation Started and it’s Asking for Accepting the License Agreement to Procees further, So Select I accept the terms in the license agreement and then Click on Next.


Accept the License Agreement
Now on our next installation step It’s again asking for Accept the License Agreement as shown on the snapshot below so select I accept the terms in the license agreement and then Click on Next.

Accept the License Agreement
Now Here it’s asking for Product Update on startup. I dont’s want to Update the Package on startup So just select No and Click Next to Proceed for Further Step.


Select No for Updates
Now on next step of installation its asking for feedback, Here i will select No and Click on Next.

Select No for Vmware Software Updates
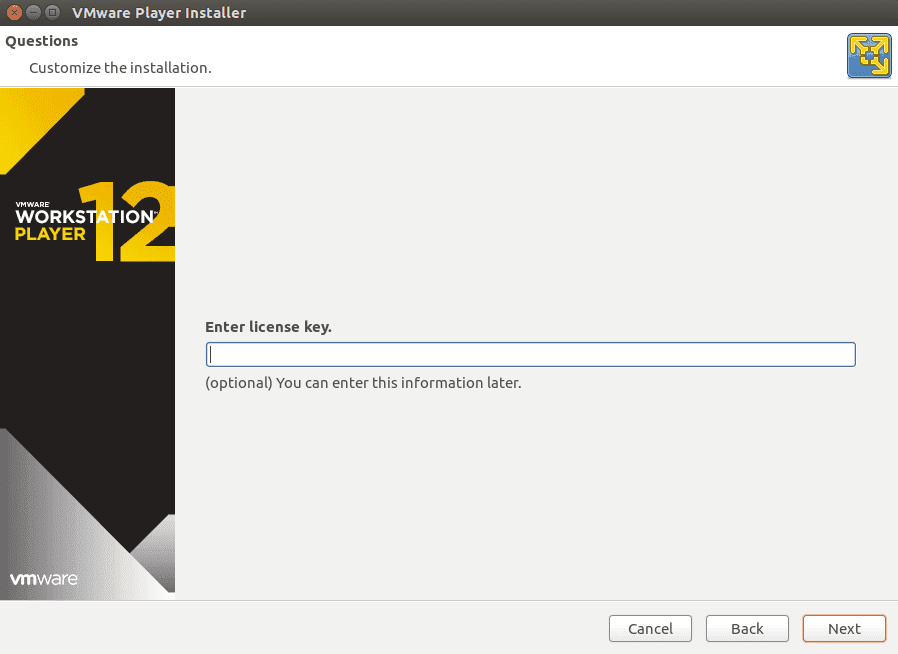
As shown on the snapshot below now it’s asking for License Key But it’s Optional, we can enter it later on. So for now we can Proceed the installation further by Click on Next.

Skip the License Key windows by Click Next
Click on the Install to start the Installation Process as shown on the snapshot below.
Start the Installation Process by click on Install
As shown on the snapshot below the Installation Process Completed Successfully, Now Click on Close.
Vmware Workstation Player 12 Installed
To Open Vmware workstation Player 12 Click on the Application Manager and Search for Vmware Player and then Click on Vmware Player Icon.


Search the Package in Application Manager to Open
As we are using Free and Non-Commercial Version of Vmware Player Package it’s asking to enter your Email Id, Just Enter it and then Click Ok.

Enter Email ID and Click on OK
As we can see below Vmware Workstation 12 Player Started.

Vmware Workstation Player 12 Started

So This is how we can install Vmware Player 12 on Ubuntu 16.04. If you found this article Useful then Like It, Share It or Subscribe us For Updated Guides and Tutorials.
If you have some thing to say then feel free to Comment on the Comment box below.

Ubuntu Social Media Kit
This Snap consists of famous social applications which are widely used by people worldwide,
currently there are seven application namely Whatsapp, Facebook Desktop App, Messenger, Telegram, Vk, Twitter and Gmail . Each app support dark theming and pulls desktop notification and system tray feature.
All Applications runs separately and integrate with desktop technologies to bring best experience,
Client support update applications in future and update their core, so that users can get new features in future.
Snap Install may not fully integrate with Ubuntu, so you can try download and install Debian(.deb) package from this URL-
.deb Download 
Download AppImage and mark it executable (with nautilus) or in terminal as
chmod a+x ubuntu-social-kit_latest_amd64.AppImage
double file click to run it.
Snap package can be downloaded from Ubuntu Software center or 
.snap Download
Developed by: Keshav Bhatt
gmail ubuntu desktop app
whatsapp ubuntu desktop app
telegram ubuntu desktop app
Messenger ubuntu desktop app
facebook desktop ubuntu app
vk ubuntu desktop app 16.04
twitter ubuntu desktop app 16.04

Author Name

Haykel Maaoui

Formulaire de contact

Nom

E-mail *

Message *

Fourni par Blogger.